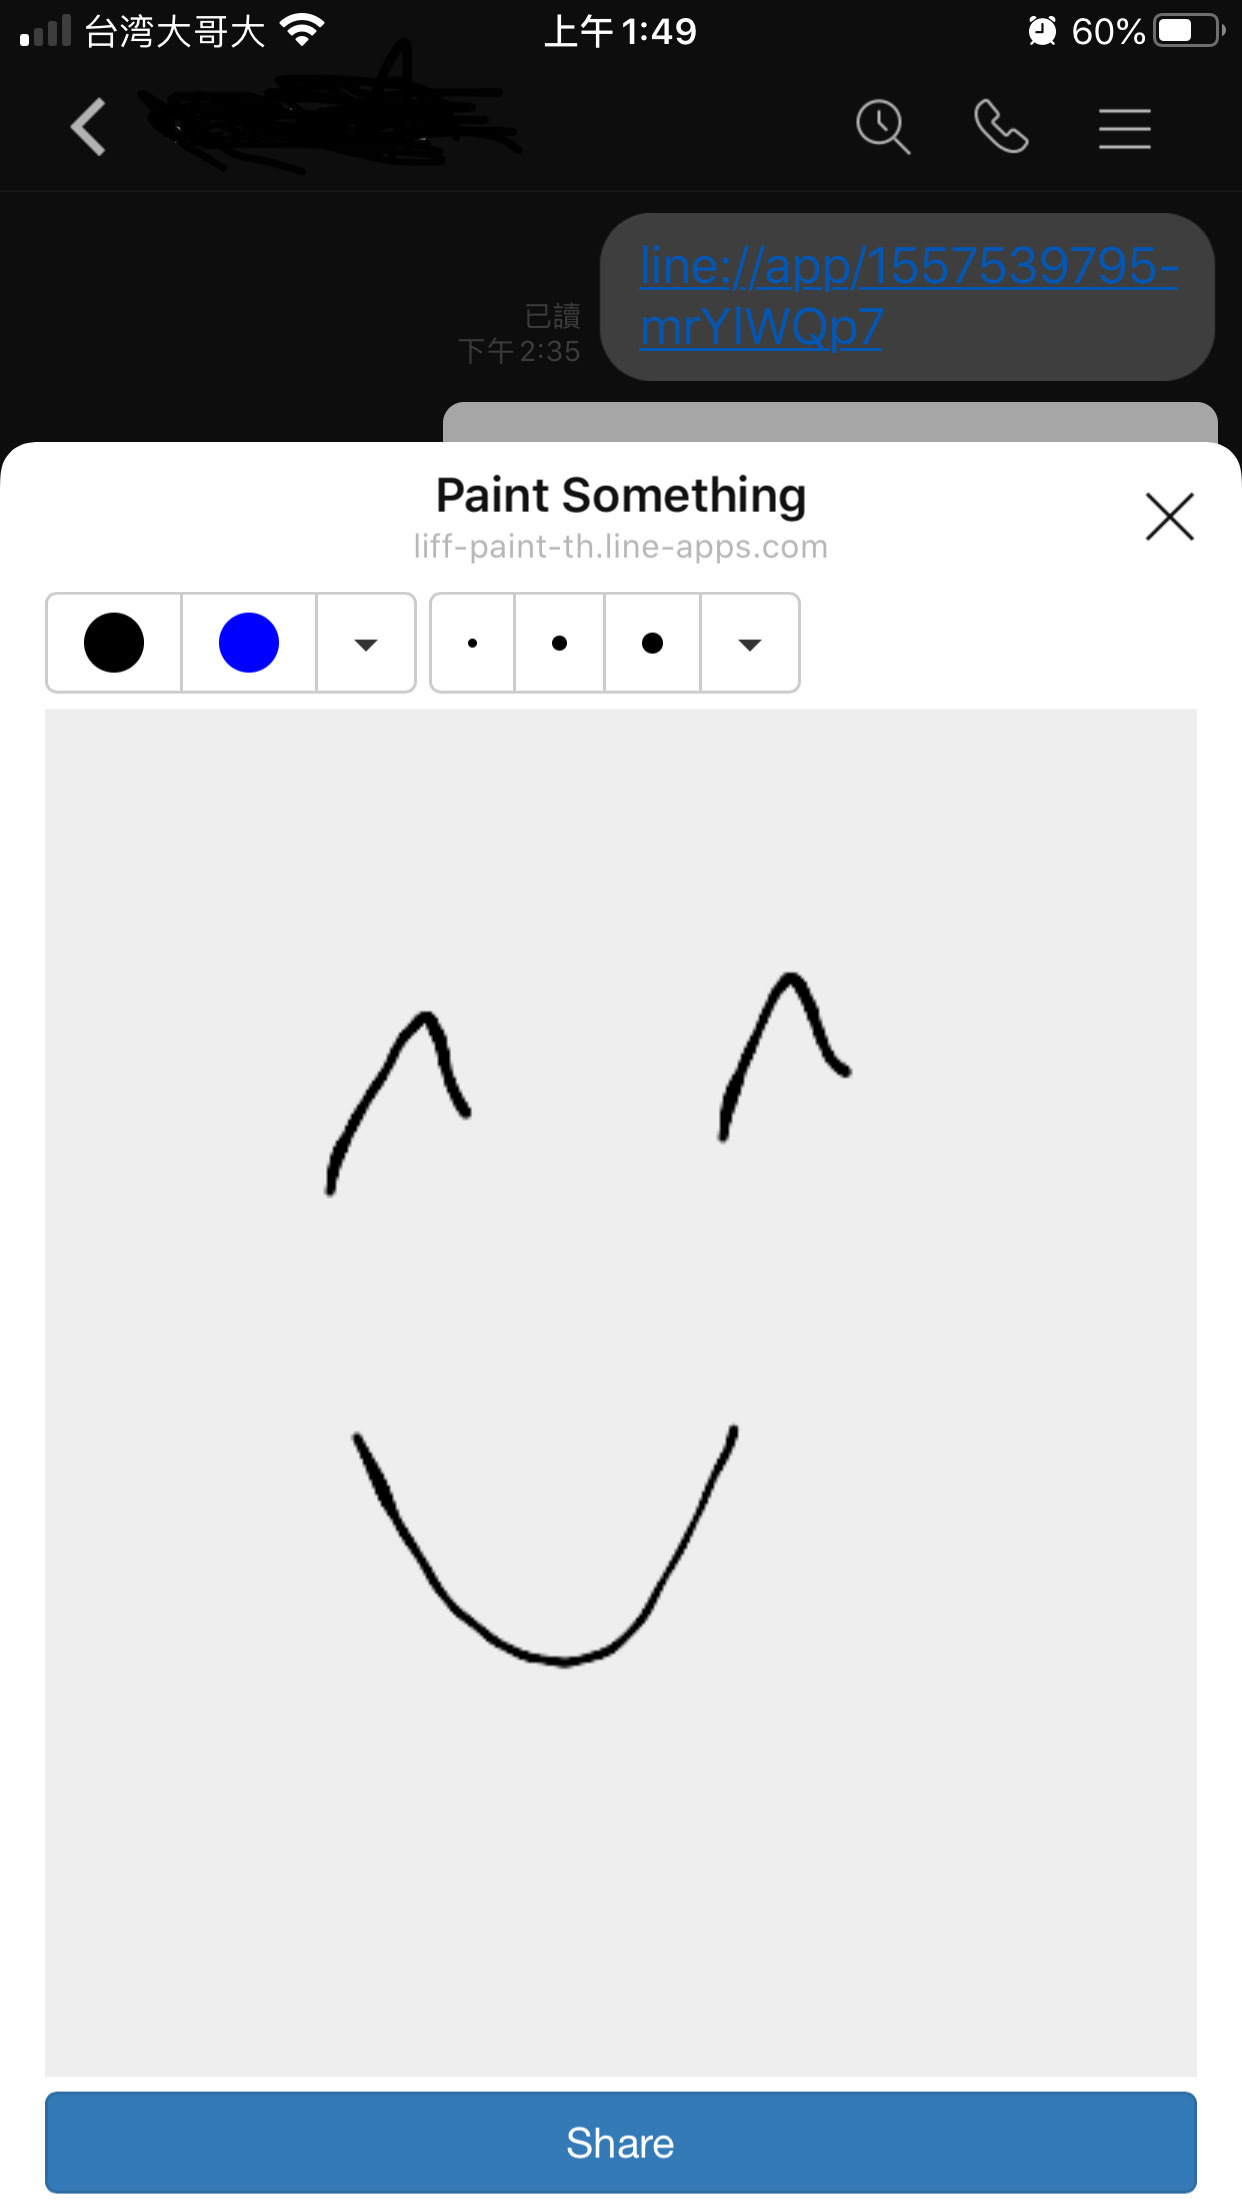
前言故事 小唯的老闆,今天拿了自己的 iPhone 手機過來,問道:「幫我看看,這是怎麼做的。」小唯探過頭去,老闆手機上開著 LINE,一篇對話視窗內,其中一則對話內容是個連結 line://app/1557539795-mrYlWQp7。老闆點了連結,app 底部跳出一個繪圖區,看起來 LINE 很不搭,不像是原生的功能,接著看著老闆在繪圖區畫了畫,點選送出,剛畫完的作品就貼到了對話視窗內 😦
事後上網查詢後,小唯才知道這技術叫做 LIFF,一句話來解釋就是讓開發者能透過 WebView 與 JavaScript 等技術與 LINE app 做互動,當然實際背後有更多技術成分讓互動上更便利與安全。
如何從底部跳出視窗 底部跳出視窗,這個看似 iOS 預設顯示選單的方式,在 Android 上要如何實現呢?🤔 這應該不是預設 Dialog 就能直接做到的效果,小唯這邊選擇使用 DialogFragment:
BottomDialogFragment.kt 1 2 3 4 5 6 7 8 9 10 11 12 13 14 15 16 17 18 19 20 21 22 23 24 25 26 27 28 29 30 31 32 33 class BottomDialogFragment : DialogFragment private var _binding : BottomDialogFragmentBinding? = null private val binding get () = _binding!! override fun onCreate (savedInstanceState: Bundle ?) super .onCreate(savedInstanceState) setStyle( STYLE_NORMAL, R.style.BottomDialogFragment ) } override fun onCreateView ( inflater: LayoutInflater , container: ViewGroup ?, savedInstanceState: Bundle ? ) _binding = BottomDialogFragmentBinding.inflate(inflater, container, false ) return _binding?.viewRoot } override fun onViewCreated (view: View , savedInstanceState: Bundle ?) super .onViewCreated(view, savedInstanceState) _binding?.webView?.loadUrl("https://wm4n.github.io" ) } override fun onDestroyView () super .onDestroyView() _binding = null } }
Layout 樣式 以上程式碼應該就是 DialogFragment 的標準做法,網路上很多基本範例都是這樣,其中有幾個小地方,經過小唯特別修改,以達成預期的效果。
首先,layout 的樣式,也就是 BottomDialogFragmentBinding 的實作(因為是 DataBinding,所以實際 xml 名稱為 bottom_dialog_fragment):
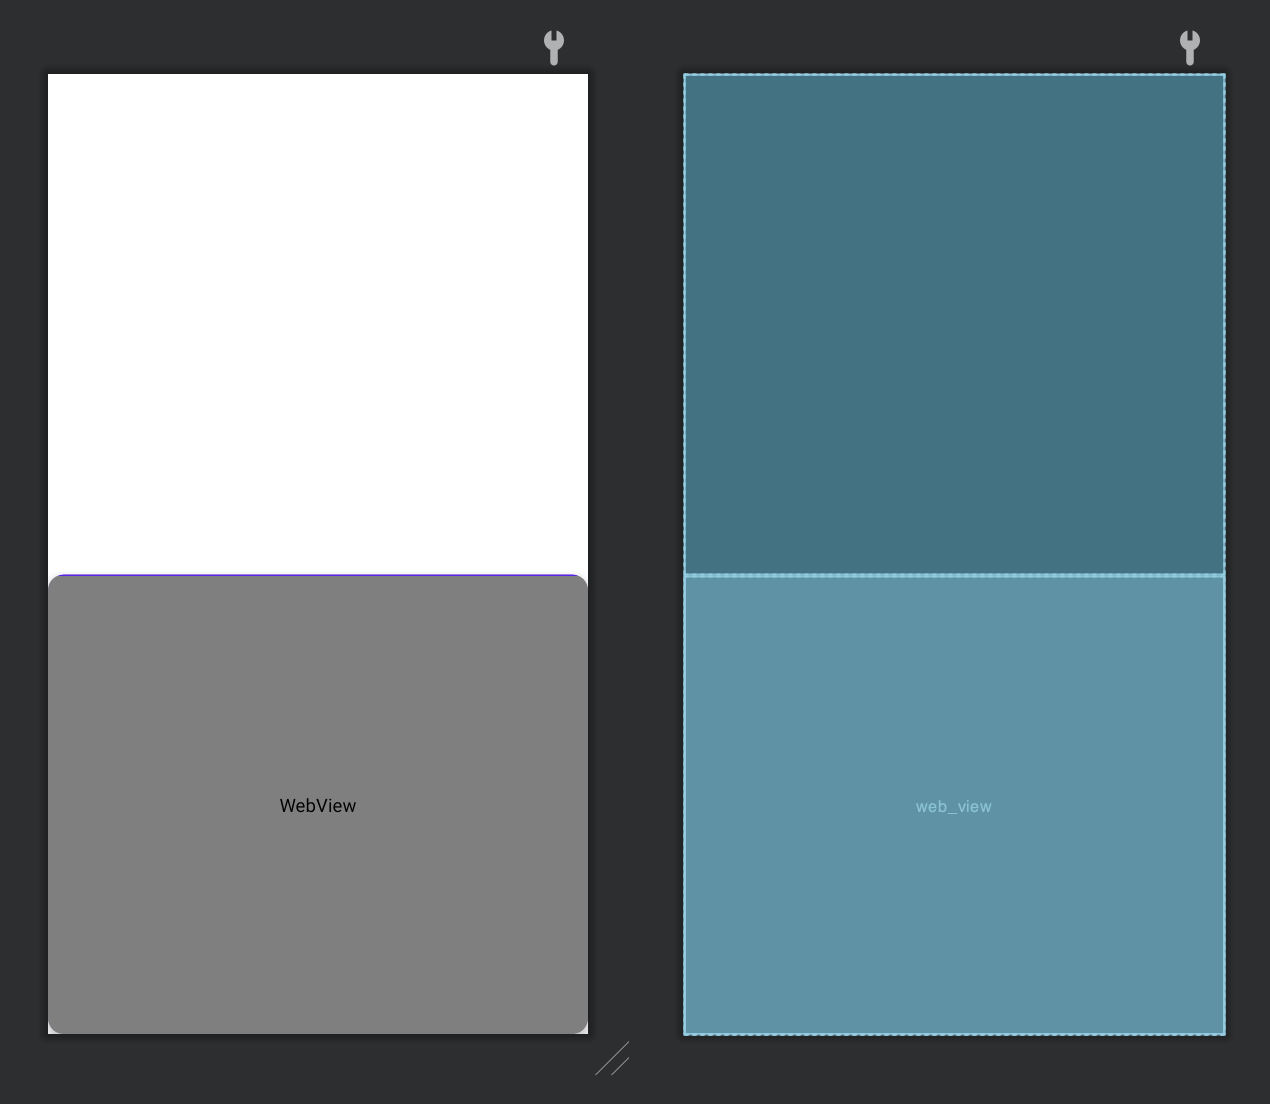
bottom_dialog_fragment.xml 1 2 3 4 5 6 7 8 9 10 11 12 13 14 15 16 17 18 19 20 21 22 23 24 25 26 27 28 29 30 31 32 33 34 35 36 <?xml version="1.0" encoding="utf-8"?> <layout xmlns:android ="http://schemas.android.com/apk/res/android" xmlns:app ="http://schemas.android.com/apk/res-auto" > <data > </data > <androidx.constraintlayout.widget.ConstraintLayout android:id ="@+id/view_root" android:layout_width ="match_parent" android:layout_height ="match_parent" android:fitsSystemWindows ="true" android:background ="@android:color/transparent" > <androidx.cardview.widget.CardView android:id ="@+id/card_view" android:layout_width ="0dp" android:layout_height ="350dp" android:elevation ="8dp" app:cardCornerRadius ="12dp" app:cardBackgroundColor ="?colorPrimary" app:cardElevation ="8dp" app:contentPaddingTop ="1dp" app:layout_constraintBottom_toBottomOf ="parent" app:layout_constraintEnd_toEndOf ="parent" app:layout_constraintStart_toStartOf ="parent" > <WebView android:id ="@+id/web_view" android:layout_width ="match_parent" android:layout_height ="match_parent" /> </androidx.cardview.widget.CardView > </androidx.constraintlayout.widget.ConstraintLayout > </layout >
這在畫面的下方,放一個 CardView,裡面包著一個 WebView,範例使用 350dp 來當底部高度來模擬,實際上應該要是一個可控的參數,如下圖:
Style 樣式 Style 樣式可說是這效果的重點,也是小唯花費最多的時間在嘗試的部分,網路上資源很少,官方文件說明也很不容易懂,加上各個設定需互相搭配,組合起來數量可真是不少,以下是在 onCreate 中先指定 style 樣式:
onCreate 1 2 3 4 5 6 7 8 override fun onCreate (savedInstanceState: Bundle ?) super .onCreate(savedInstanceState) setStyle( STYLE_NORMAL, R.style.BottomDialogFragment ) }
另外在 styles.xml 中定義實際的樣式設定:
styles.xml 1 2 3 4 5 6 7 8 9 10 11 <style name ="BottomDialogFragment" parent ="android:Theme.Translucent.NoTitleBar" > <item name ="android:windowAnimationStyle" > @style/BottomDialogFragmentAnimation</item > <item name ="android:windowTranslucentStatus" > false</item > <item name ="android:statusBarColor" > @android:color/transparent</item > <item name ="android:windowDrawsSystemBarBackgrounds" > true</item > </style > <style name ="BottomDialogFragmentAnimation" parent ="@android:style/Animation.Activity" > <item name ="android:windowEnterAnimation" > @anim/slide_in_from_bottom</item > <item name ="android:windowExitAnimation" > @anim/slide_out_to_bottom</item > </style >
以上是小唯測試過,最少 style 樣式設定內,可達成指定效果的,每行說明如下:
parent 繼承 android:Theme.Translucent.NoTitleBar,確保使用透明背景時,同時保留 status bar (status 事情況保留,如果本身 App 中隱藏 status bar,這邊可以使用 android:Theme.Translucent.NoTitleBar.Fullscreen)
windowTranslucentStatus、statusBarColor、windowDrawsSystemBarBackgrounds 搭配一起使用,三個設定讓 DialogFragment 的 status bar 變成完全透明,這讓向上移動的動畫效果不會出現殘影
slide 動畫只是單純的 translation 如下
slide_in_from_bottom.xml 1 2 3 4 5 6 7 <set xmlns:android ="http://schemas.android.com/apk/res/android" android:duration ="@android:integer/config_mediumAnimTime" android:interpolator ="@android:interpolator/linear" ><translate android:fromYDelta ="50%p" android:toYDelta ="0" /> </set >
slide_out_to_bottom.xml 1 2 3 4 5 6 7 <set xmlns:android ="http://schemas.android.com/apk/res/android" android:duration ="@android:integer/config_mediumAnimTime" android:interpolator ="@android:interpolator/linear" ><translate android:fromYDelta ="0" android:toYDelta ="50%p" /> </set >
執行與驗證 最後,要使用 DialogFragment 也是相當容易:
MainActivity.kt 1 2 val f = BottomDialogFragment()f.show(supportFragmentManager, "BottomDialogFragment" )
效果如下:
VIDEO
相關連結:
------------- 本文结束